Wednesday, November 4, 2015

Greek Goodness~ A Writing Unit Focusing on Greek Characters


I'm excited to announce that I finally finished writing a new unit that helps students research a Greek mythology character, take notes on their findings, outline an essay, and write a rough draft as well as a final copy.  It also has guidelines for how students can create a high-quality poster and develop a presentation all about their character.  The following 19 fourth grade CCSS are covered in this unit:
4.RL.3, 4.RL.4, 4.RI.1, 4.RI.2, 4.RI.4, 4.RI.9, 4.W.2, 4.W.4, 4.W.5, 4.W.6, 4.W.7, 4.W.8, 4.W.9, 4.W.10, 4.SL.4, 4.SL.5, 4.SL.6, 4.L.1, and 4.L.2. This fits many 3-6th grade standards as well.  My new unit even includes audience member expectations so that you can keep all your students engaged during presentations!

Below is the unit schedule and general information on audience member guidelines.  You can find the complete product, ready to print & use with your students, on my TeachersPayTeachers account at https://www.teacherspayteachers.com/Product/Greek-Mythology-Character-Writing-Unit-2185774

Unit Schedule
I usually give my fourth graders about 3-4 weeks for this unit, depending upon how much time we can devote to writing each day and the level of skill & speed of my students for the year.  Generally, I have about a half hour for writing each day.  You can adjust the following schedule to fit the needs of your students and your writing schedule:

Week 1: I introduce the unit with the included materials, students choose their mythology character, gather books from the library, print information from websites like http://www.greekmythology.com/ , and start writing the information into their outlines (blank copies for student use are in the unit).

Week 2:  I introduce the sentence frames included in this unit's rough draft and review editing later in the week.  Students draft their essays with the help of the sentence frames in the included rough draft.  I only let my lower-level students have a personal copy of the sentence frames to actually write on, and I discuss and display the frames on the SmartBoard to assist the rest of my class, but encourage them to write their own sentences.  Students begin editing.  If I’m using this for an official writing assessment, I don’t let them peer edit or use the exact sentence stems in their final copies, but otherwise they work with at least two other people to edit their work.

Week 3: I show students example final copy essays, like the one included in this unit, as well as posters created by former students.  Students finish editing their essays and write their final copies.  They begin work on designing their poster (I have them create them at home as homework over a week).

Week 4:  I introduce converting an essay into a speech (writing the keywords from one paragraph of the essay on each index card for their presentation).  Students summarize their essays on their notecards, practice presenting, and present their character to the class utilizing their posters!  When students are not presenting, they are listening attentively to the presenter to provide feedback because everyone is expected to tell a presenter what they did well on and how they could improve their presentation.  

Audience Expectations during Presentations
Once the presenter finishes, we clap for them as a class, students raise their hands, and the presenter calls on a student of their choice- the first student they call on gives positive feedback, the second gives something to work on.  Once a student has been called on a speaker, they can’t raise their hand again until everyone in the class has gotten a chance to give feedback.  i tell them before hand that I sometimes cold call a student who doesn’t seem to be paying attention to keep them listening to their peer’s presentations and evaluating their work.  After the two pieces of feedback have been given to the presenter, the speaker gets to choose a fun way to be congratulated, like a round of applause, a microwave (students wave to the presenter with just the tips of their fingers), etc.


Again, if you’d like to cover a plethora of standards in one fun writing unit, this is the perfect product!  This unit includes:
*a weekly unit schedule to guide your teaching
*an outline for students to gather information on
*a blank rough draft complete with sentence stems to help students frame complete sentences and flowing paragraphs for the whole essay
*a completed rough draft with sentence frames filled in so students know how to use them
*a sample final essay
*a title page for student’s essays & space for an illustration
*guidelines for a poster
*tips for success presenting orally about their Greek character
*expectations for audience participation

Find it at https://www.teacherspayteachers.com/Product/Greek-Mythology-Character-Writing-Unit-2185774 Thank you so much for buying this product and supporting my work.  Because of your purchase, a teacher’s request on DonorsChoose.org will be a little closer to being funded, and great new supplies will soon be in the hands of our youth.  Your purchase will also help provide food, clothing, shelter, medicine, or the start to a new small business for the world’s most impoverished people through Food for the Poor  (I give 20% of my profits to charity).  I greatly appreciate your support.

Wednesday, March 25, 2015

St. Patrick's Day Shamrock Art

This is a fun project that my students enjoy doing a few weeks before St. Patrick's Day.  First I read aloud from a few different St. Patrick/Irish books, like St. Patrick & the Peddler, Jamie O'Rourke & the Pooka, Daniel O'Rourke, etc.
 

Then I start with a mini lesson on some art vocabulary, including line, color, and mediums.  We talk about how we'll only be using one color, green, but that there are many shades of green, like we observed in the Irish texts from the Emerald Isles.  I discuss the different types of lines in art, like dotted, dashed, swirly, and straight lines (I also contrast this with the mathematical definition of line; in math, a line has to be perfectly straight and it goes on forever in both directions).  Last, I talk about the different mediums they'll be using- the paper shamrock, colored pencils, markers, crayons, and glue.


After showing a few examples of how to use a variety of green lines to decorate their shamrock, students are released to start their creations.  We glue them onto a black background for better contrast, and then write one Irish phrase on it.  Students can choose an Irish phrase they remember from one of our read alouds (with teacher check ins), or they can choose one from the list I display on the Smartboard.  Some of the phrases I display include:

It’s easy to halve a potato where there is love.
Mind the pooka!
Laughter is brightest where food is best.
Beware o’ the leprechaun!
Top o’ the morning to you!
Happy Saint Patrick's Day!
If you don’t know the way, walk slowly.
Saints preserve us!
Luck be with you!

 
There's an easy art lesson for a fun holiday!  What do you do for St. Patrick's Day or other spring holidays?  Leave your idea in the comments below.  Happy St. Patrick's Day to you!

Thursday, July 31, 2014

Back to School Share


What is your favorite back-to-school teacher hack?  What do you always forget about until you step foot in your classroom in the fall?  I'm compiling a list for a new teacher (and hope to give it out to all of my student teachers and for free on TeachersPayTeachers.com as well), and I hope to have a "Teacher To-Do List for Back-to-School."  Please share your thoughts in the comments below to help other educators.  I've put some questions in bold to think and share on, but I'd love to hear input on any back-to-school subject.  Here are some basic ideas that I've come up with so far:

*Organize the furniture.  Usually having large furniture up against the walls will open the room the most and make it seem bigger.  It will also make for easy flow of student traffic.  How do you like to arrange the furniture in your classroom?  More specifically, where do you place your teacher desk?  Check out this site that has a bunch of different layouts & styles of classroom decorations- http://www.theschoolsupplyaddict.com/room-setup.html 

*Set up your student desks how you plan to teach.  If you want a lot of silent, independent work time with lots of teacher lecture/instruction, separate all your desks and have them all face the main board of instruction. If you like more student interaction, peer learning, and cooperative work, I suggest making long rows of students facing each other so that everyone in the classroom need only turn their head slightly to face the main instruction area. I usually have three long rows, split into six cooperative learning groups with a bout 5 students in each group (heterogeneously grouped with talkers near quiet students and my ELL's, and behavior/attention students near the front or with an empty desk nearest them, etc). Above and below are a couple pictures from a few years ago, when I still had each table group separated instead of in longer table rows:
*Hang up your emergency folder in a visible area near the emergency exit.  Mine is a red pocket folder that has a student roster and what to do in case of each type of emergency on one side, and all of my students' emergency forms on the other (with where to send them in case of an early closure).  Make sure you/someone on your team has an emergency kit to take out with you during a fire drill/ real emergency.  What's in your emergency kits at your school?
* Put up posters. Decide what you want up for the students to read on the first day when they walk in where you want to put posters you'll create with them and display.  I've organized my posters by unit of study, and I'll get a blog up about that one of these days! :)  Make sure to leave room for necessary postings, like the map to the nearest emergency exit, what to do in a Lock Down drill, etc.  What posters do you display on the first day of school?  What posters/visuals do you make with your students during the first week?

*Plan your first week of lessons.  I always plan more than we could possibly do, because it's better to have too many things planned and knock some of them off/save them for the next day than to have too little planned.  

*Plan what you're going to say in the first 10 minutes of class.  They will set mood for the whole year.  Harry Wong's First Days of School is a great place to start if you're a new teacher.

*Prepare all the worksheets/books/materials you will need for the first week of school.  Dust off the text books, send homework to print, and ready the manipulatives!

*Put students' names/numbers on everything.  I just write their names on little address labels (you could easily print them too).  I put names on:
-backpack hooks/cubbies
-mailboxes
-student work files
-name plates for their desks
-my teacher pensive with all of their writing & reading conference notes/running records/goals/etc

I put their student numbers on:
-a dry erase marker (to keep inside their desk. If they lose it or ruin it, they get a new one, but it costs 5 Pioneer Dollars, which is the money they earn in the token economy we do in my class)
-an editing marker (also kept inside their desk for writing)
-the homework chart (along with their name. This is where we keep their name & number posted throughout the whole year so they can look up their own number in case they forget, or figure out which student the editing marker they just found on the ground belongs to).
-their clicker/smart response remote for answering questions on the Smartboard.

*Write your back-to-school/welcome letter and send it to print.  What do you include in your letter to parents?  I'll get a copy of mine on TPT, or I can email it to you if you leave your email address in the comments below.

*Organize your classroom library.  For tips, see my post about it here- http://applesofyoureye.blogspot.com/2012/10/organizing-your-classroom-library.html

*Decorations/theme-  I'll need to write an entirely separate post about decorating a classroom, but I generally like to choose a color theme rather than a specific thing.  Instead of doing owls, cupcakes, a popular movie, etc, which will be slightly awkward to repeat the next year and will undoubtedly go out of fashion in the near future, I chose to go with a blue and purple theme and selected different timeless decorations, classroom furniture, accessories to match.  (I do love owls, cupcakes, movies themes, etc, and I've seen many of my colleagues have absolutely darling rooms with these themes, but I also see them spending at least $20, if not hundreds, every year or two as each popular theme loses popularity.

*Write a grant on DonorsChoose.org.  The best time to get a grant funded is in August & September, because those are generally the months that large corporations want to get some time in the spotlight for their generous contributions to the schools.  Think about what you still need/want for your classroom in the last few weeks of summer and take an hour to write up a grant for it.  It's one of the easiest things that I've done to gain over $5,000 worth of products for our classroom in a little over a dozen grants.

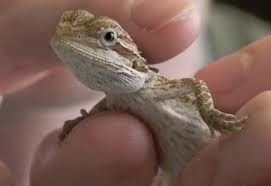
*Think about a class pet. If you want one for free (or nearly free) visit PetsInTheClassroom.org and fill out the easiest grant you'll ever write in your life!  It is literally TWO sentences long!  See my post about the many benefits of having a pet in your classroom-http://applesofyoureye.blogspot.com/2012/08/great-classroom-pets-explained-bearded.html

*Write your back-to-school/welcome letter and send it to print.  What do you include in your letter to families? I'll get a copy of mine on TPT, or I can email it to you if you leave your email address in the comments below.

*Bring in some oxygen when you bring in some plants.  Read my posting about how you can increase the oxygen levels in your room and implement some educational ventures with some green leafies as well here-http://applesofyoureye.blogspot.com/2012/09/the-case-for-class-plants.html


*Prepare a substitute folder. I created emergency sub plans for mine, ones that any sub could whip out and employ on any given day in the year if some emergency came up where I couldn't make lesson plans. Make sure it's somewhere easily visible, and include any health plans or notes on particularly challenging students.

Okay, mastermind teachers!  What are your other tips for preparing the classroom for the first day of school? Please leave your advice, ideas, & questions below!

Tuesday, October 1, 2013

New Blog- Pennywise Pursuit!

Want to save a few thousand dollars each year with some small changes?  Check out my new blog, PennywisePursuit.blogspot.com to do just that! My husband and I are working together on it to share ideas on simple ways to have more money for the important things in your life.  


Take a look and let us know what you think!

multimedia-family-media-multi-tasking-m.jpg

Wednesday, September 18, 2013

Getting Creative & Multilingual with Table Group Names

Instead of having the same, boring table group names for the entire year, I like to mix things up and make them educational at the same time.  Below, you will find a plethora of table group names that fit the different units we do throughout the year, like this one from our first math unit- place value!

Here are our table group names for our geometry unit.  You could do them in two languages, have the picture on one side and the name on the other, or do the name of the figure on one side and its definition on the other like I've done here.

One of the highlights for third and fourth grade for social studies is state history.  Here are some pioneer-ish table group names; one side is English and the other is in a different language.
For our temperate rainforest unit, I have the name of a common temperate rainforest animal on one side of the table group name and its name in a different language on the back.

In our fraction unit, we use these table group names with a common fraction written in words on the front with the picture shown in bars, and the fraction written numerically on the back with the fraction shown in a circle.  I just hole punch a little hole at the top of each piece of construction paper after I laminate it, thread a string through it, tie a little thumb tack to the end, and pierce the ceiling tile so it dangles over the center of the table group.

We also cover Oregon geography and the continents, so I have created these table group names to put up during those units:


What are some of the table group names that you have used in the past?  How do you connect them with the units you teach?  Leave a comment below, and check back for more teaching goodness!

Thursday, September 12, 2013

Why I Haven't Posted in a While-

This is just a quick post to let you know why I haven't posted in a few months- my daughter joined us in early July at 8 pounds 6 ounces and 20 inches long.  I'm adjusting to my new role as mommy, but hope to be posting a bunch in a few weeks as I'll have time off of work until December.  Thanks for your prayers and happy thoughts for my newest blessing!


Wednesday, May 22, 2013

Guessing Jar: Math Made Delicious!

I was introduced to the concept of the Guessing Jar by my wonderful mentor teacher, Jacqui Forney, when I student taught in her classroom.  This activity, which I do about once a month, is a fantastic way to incorporate a variety of mathematical concepts and it can be modified to fit nearly every grade level.  It makes math exciting, students are highly engaged, it costs very little, and it's delicious!

Guessing Jar Supplies
As you can see in the picture below, all you'll need for the Guessing Jar is a large, clear container with a lid (I cleaned out an almond container from Costco for mine), a label for the jar, a folder, and some sticky notes or scraps of paper.
"How many things do you think there are in this little Guessing Jar?"

Deliciousness with Which to Fill It 
Each month, decide upon what type of scrumptious treat with which you'd like to fill the jar.  Some examples I've used in the past, with the time of year/unit in parenthesis are:

Candy corn/pumpkins (fall)
Apple candy (fall)
Gummy trees (Christmas, temperate rainforest)
Snowman poop/marshmallows (winter)
Gummy snowflakes/snowmen (winter)
Gummy hearts/mixed pink & red candy (St. Valentine's Day)
Golden chocolate coins(St. Patrick's Day)

Saltwater taffy(spring/summer)

Gummy butterflies (spring/summer)

Pilot bread/Hardtac (Oregon Trail/Fur Trapper)

Swedish fish (temperate rainforest)
Trail mix, crackers, dried fruit, etc will work year round.  Usually, I base it off of what I can get on clearance, in the seasonal bulk candy bins at Winco, or just whatever is least expensive at the store!

Preparing for the Glorious Guessing Jar Day
I love watching which of my students will be the first to realize that I have filled the Guessing Jar with some new form of tasty treat.  Initially, you will want to carefully wash your hands, clean/sanitize the container, and add the filling.  Screw the lid on tightly and make sure your students know that the lid must stay on the container at all times until it is Guessing Jar Day.  Explain to your students that they will be making an estimate (here's a great lesson in and of itself), and cover different strategies for making an accurate estimate.  They can pick it up, count the number of treats on the outside, count how many are on one side, etc.  Once they have an estimate, they can take a little sticky note/slip of paper, and write their guess, the label, and their name on the paper (such as, "452 candy corn pieces, Mrs. Madison).  Let them know that if it is missing any of these three things, it will tragically be thrown away; then you will have to deal with fewer no names.  I like to get them in the habit of labeling any mathematical answer, as it will serve them well throughout their math careers.  Once they have their guess, label, and name recorded, they can open the folder and add their estimate to their classmates'.  There is no peeking into the folder before hand to base their guess off of someone else's estimate; sneaking a peek will also result in their tragic disqualification (they can always try again next month).  I usually put this on the morning board as one of their tasks to do as they prepare for the day, which also helps reinforce the importance of following the board directions in the morning.

Guessing Jar Day
In reality, the whole Guessing Jar activity usually only takes about an hour, but you could very easily fill an entire day with it.  I save one morning a month to do Guessing Jar, and the kids LOVE it.  Here's how the morning goes:

1.  Students wipe down their desktop & pencil, wash their hands, get a piece of paper towel at their desk, and get a piece of graph paper out at their desk.
2.  While students head and title their papers, I rove around the classroom and hand out a random handful of the Guessing Jar contents to each student on their paper towel when I see they are ready.  It doesn't matter how much they get at this point, because we will divide it all evenly later.  There is always something for every student to be doing, whether they are a slow worker or fast; this helps ensure their full engagement.  If students are not doing their jobs as mathematicians during Guessing Jar, then they do not earn its delicious contents (I have only had this happen once in the last six years).
3.  Their first job is to count how many they have (often times I will have them categorize whatever it is by color, shape, etc to add additional dimensions to our data) and to record their results on their graph paper.  Then they help their table group find their personal totals, and finally they determine their whole table group totals.  Once everyone has it written down, they choose one representative to come up to the Smartboard and record their table's data in our class chart (just a chart with table group names and columns to record each table group's data).  Quick students will complete this and have time to find the total number for the whole class, and divide it by the number of students so we know how many each student will get at the end of Guessing Jar.
4.  Next, you can tailor the Guessing Jar to whatever form of math you're working on.  If you're doing fractions, determine the fractional amount of each color of saltwater taffy, for example.  If graphing is your focus, create a pictograph of the different types of Chex party mix, or a bar graph for each color of gummy worm.  If you're focus is multiplication and division,  analyze the data by finding the mean, median, mode, range, etc.  I usually do graphs regardless of our current unit of study so they don't have to wait until the end of the school year to hear all the great vocabulary that comes with the unit, and it's great to practice fine motor skills as well as learning to read & create different tables, charts, graphs, etc for literacy.
5.  Have your fastest students order the estimates in the Guessing Jar folder from least to greatest.  Once you know the total for the Guessing Jar (when your students find it, thus eliminating the need for you to count everything), you can determine which student made the closest estimate.  I usually give that student 2 pioneer dollars (part of our classroom's token economy) and we all congratulate him or her.  Generally, I have them share how they came up with their accurate estimate, which can further help other students develop their estimation skills.
6.  Last, once the main math part is done and the students have determined how many pieces of the Guessing Jar goodies each person gets, we divide them up.  If students have more than they need to fill their Guessing Jar quota, they bring their extras to my desk, and students who I originally gave a tiny handful can come up to my desk to get their missing snacks.  Sometimes I check the students' papers before they start enjoying their Guessing Jar loot, and other times I have them just turn their papers in so I can check them later.
7.  Clean out the Guessing Jar, recycle or hand back the old estimates, and refill the Guessing Jar with something new so the fun can begin again!

Important Notes
If you have students with any kind of allergy, you will obviously want to check the ingredient list very carefully for whatever you decide to put in the jar.  In the past, when I have had students who are allergic to multiple things, I didn't even want to take the risk of causing any kind of a reaction.  Instead of handling the food or even being near it, I had them work at my desk, and just do the math part.  When they were done with the math, they got an alternative treat that was safe for them to eat.  This assures their safety, but still keeps if fun because they get something delicious too.  Use your best judgement, and always err on the safe side!

I generally do not give out junk food or candy as prizes in my classroom, and I require all daily snacks to be at least moderately healthy.  Because we only do Guessing Jar once a month, it should not have any great impact on the overall health of my students, which is how I can justify them eating a few high fructose corn syrup laced treats.  I also invite my students to eat part of their tasty math bounty, and then save the rest for lunch or home.  Generally, because the container is relatively small, students only end up with a small handful of sugary goodness anyways.  Still, the health of your students should be taken into consideration when choosing your Guessing Jar fillings.

Questions about the Guessing Jar Extravaganza?  Leave a comment below!  If you have a neat variation you can share with us or an idea on how to make it even better, let us know too.  If you would like the Word document that has the label I use on my jar, just leave your email address below so I can send it your way.  Comment, share, pass it on, and have fun with your students and the Guessing Jar!